Setting up StayFi
Step by step instructions for setting up your StayFi Account
Table of Contents
- Setting up your WiFi Experience
- Naming your Wifi network
- Creating a property
- Connecting your email provider
- Requiring a valid email to log in (optional)
- Ordering access points
- Assigning access points to properties
- Installing access points
- Updating your guest wifi instructions
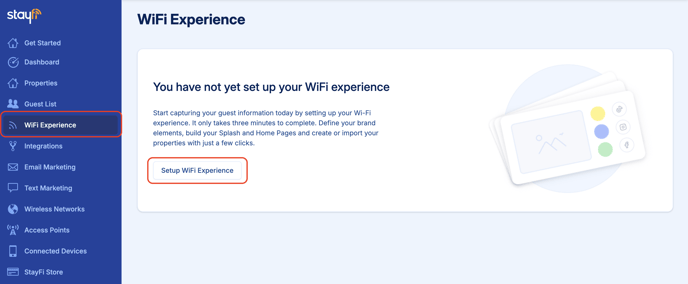
Set up your WiFi Experience

Create the templates for the Splash Pages and HomePages that will be part of your guest's WiFi journey.
Splash Pages greet guests when they log into your new StayFi guest network for the first time. This is where you collect valuable guest data like name, email, phone number etc.
HomePages are where your guests will be redirected once they connect to the StayFi network. They are designed to increase guest satisfaction and revenue by presenting all your vacation rental's links on one page - while easily generating upselling opportunities through our partners.
For the set-by-step instructions on how to set up your WiFi Experience, click here.
Naming Your Wifi Network
StayFi automatically broadcasts both a guest and an admin network. The names of these networks will be the same in every home using StayFi.
Naming your Wifi network:
- Navigate to the Wifi Networks page on the left.
- Click the three dots to the right of each network and click edit to change the name of the network or add a password. We recommend password protecting the admin network.
- Click Update.
The guest and admin network operate on a 2.4Ghz & 5Ghz Wifi band by default. You can add a 2.4Ghz only admin network for smart lock, thermostats, etc. from the Wireless Networks page.
Creating a Property

Properties in StayFi should reflect your physical properties. We use properties to help you manage your wifi connections and keep track of which guests are staying where.
Creating a property:
- Navigate to the Properties page on the left.
- Click on "Add Property" on the top right. You'll be given the option to create your property manually or import it from you PMS.
- Complete the required property information, such as Name, Property Group and Address.
Turn on Occupancy Alerts to receive an email alert whenever the number of guests in the property exceeds a threshold you set. - Review your new property's Splash Page and customize them to your preferences.
- Review your new property's HomePage and add the links for the buttons you want to display.
- Click "Done"
Occupancy alerts are based on the number of unique guests connected to the wifi, not the number of connected devices. To send alerts to different emails, add additional team members to your account from the settings page.
Connecting Your Email Marketing Provider
StayFi will automatically push any guest information we collect directly to your email marketing provider, property management system (PMS), or customer relationship manager (CRM).
Connecting your email marketing provider:
- Navigate to the Integrations page on the left.
- Find the system you'd like to connect with StayFi and click Connect.
- Input the required fields and click Connect.
Not sure where to find the requested information? Reach out to the specific integrated partner's support team.
Requiring a Valid Email for Guest Login
StayFi partners with ZeroBounce to verify whether each email submitted by guests is valid. By default, guests who input an invalid email can still log in, however invalid emails won't be added to your mailing list.
Require a valid email for guest login:
- Navigate to the Settings page in the bottom left corner.
- Click Edit by Account Settings.
- Check the Require Valid Email for Guest Login box and click update.
Ordering Access Points
You will need to connect a Ubiquiti Access Point to your existing router to broadcast your guest WiFi network and start collecting guest information. StayFi associates all access points purchased through our store with your StayFi account before shipping.
If you need help deciding how many and which model of access points are right for your properties, you can learn about choosing the right access point here.
Assigning Access Points to Properties
Access points get shipped from the StayFi store preassigned to your account. Assigning the correct access point to the correct property keeps your guest data organized and makes solving wifi issues a breeze.
Assigning access points to properties:
- Navigate to the Access Points page on the left side of the screen. At the top of the page, you will see all unassigned access points associated with your account.
- Unassigned access points can be identified by the Mac Address, which is also printed on the bottom of the access point.
- Select the property each access point should be assigned to in the dropdown on the right hand side and click Assign.
Tip: Plugging in an access point will change its status from "Disconnected" to "Connected". This is an easy way to figure out which access point you're working with.
Already have your own Ubiquiti hardware? Reach out to our team to schedule a time to assign it to your account. Contact us.
Installing Access Points
Since access points come pre-assigned to your account, installation is a breeze. Refer to the installation instructions included with every order to learn how to set up your device.
Updating Your Guest Instructions
After installing your access point, StayFi will start broadcasting a new guest network which guests must join to see the splash page. Make sure to update your guest instructions to point them to the new network instead of where they were logging in originally. Be mindful that your passwords may have changed.
Questions? Reach out to us at support@stayfi.com.
![FullLogo-2019-1-e1576087441910.png]](https://hubspot.stayfi.com/hs-fs/hubfs/FullLogo-2019-1-e1576087441910.png?height=50&name=FullLogo-2019-1-e1576087441910.png)