![FullLogo-2019-1-e1576087441910.png]](https://hubspot.stayfi.com/hs-fs/hubfs/FullLogo-2019-1-e1576087441910.png?height=50&name=FullLogo-2019-1-e1576087441910.png)
Want to learn more about how The Host Co works? Join a live demo to get your Host Co stores up and running, or email us at support@thehost.co.
Adding a Host Co store to your HomePage
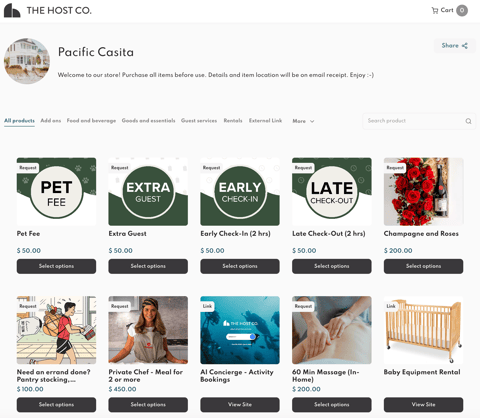
Through our partnership with The Host Co, StayFi customers will have access to an exclusive free store for each listing. In addition to being able to sell your own services/goods & early/late-checkout, The Host Co also has a curated network of local service providers that will be added to your stores automatically based on your rental’s location (this feature is available in the US only). Host Co stores can generate hundreds or even thousands of dollars in additional revenue each month.
Opt into The HostCo and we will automatically create a store for every one of your listings and add it to its corresponding HomePage.
Then, activate your Host Co account from the email they send you, and edit each of your store’s unique offerings and get each store ready to share with guests.
Tip: On top of your store links being automatically added to your HomePage, our most successful selling hosts also share their Host Co store links in their automated messaging at booking, two weeks before check-in and at check-in. Log into your Host Co account to access their automated messaging templates.
Questions? Email us at support@thehost.co, or join a live demo to get your Host Co stores up and running.
Watch our webinar with The Host Co on Mastering Vacation Rental Upselling and learn how StayFi's integration with The Host Co is helping STR operators generate hundreds of extra dollars per stay.
- Enable The HostCo tile in your HomePage Template
- Complete your properties' address information
- Access your HostCo store links
- Set up your HostCo account
- Get it touch with The HostCo
Enable The HostCo tile in your HomePage Template
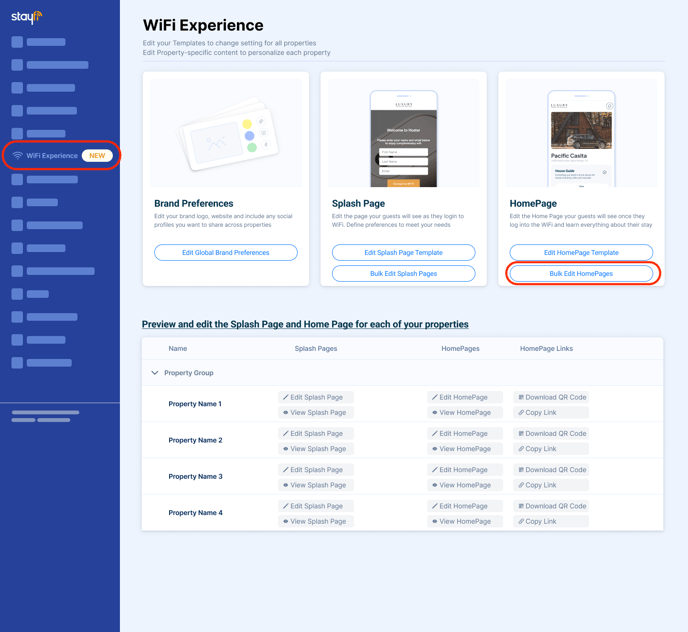
- Navigate to the "WiFi Experience" page on the left menu. On the HomePage card on the right, click “Edit HomePage Template”

- Scroll all the way down to find the Partners section and toggle on the HostCo.
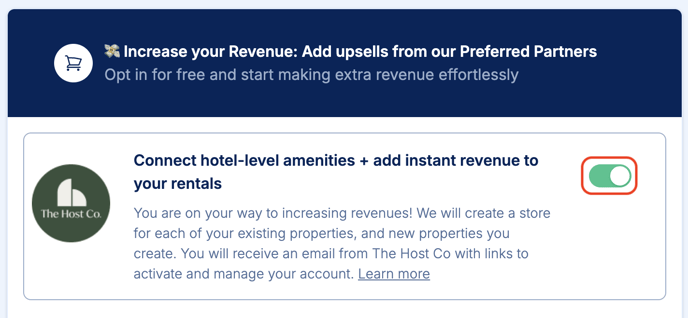
- Click "Update" at the end of the page.
- At this point, you will receive an email from The HostCo with instructions to set up your account. You don't need to do this right now. You can wait until you finish the steps in this tutorial.
Complete your properties' address information
Once you have enabled The HostCo in the HomePage Template, you will be prompted to provide the address information for each of your properties. We need the address of a property to create a HostCo store for it. You can leave the address information for a property blank, but we will not create a store for it at this time.
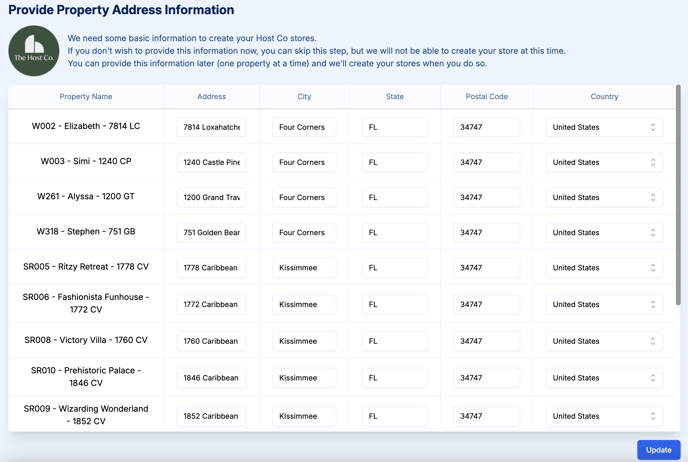 Once your are done providing the address information for all your properties, click "Update" at the end of the page.
If you have left the address information for a property blank, you can provide it by editing the property information in the Properties tab. When you have provided the full address for the property, we will go ahead and create a store for that property and add it to its HomePage.
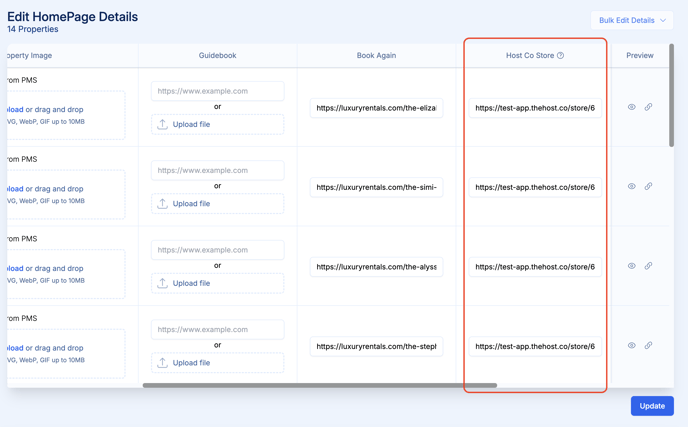
Access your HostCo store links
At this point, we will have created your HostCo stores for all properties for which we have an address and added them to your HomePages. To find the links to your newly created stores:
- Navigate to the "WiFi Experience" page on the left menu. On the HomePage card on the right, click “Bulk Edit HomePages”
- In the Bulk Editor, scroll to the right to find the HostCo Store column. You will find the link for each property's store has been added to its HomePage.
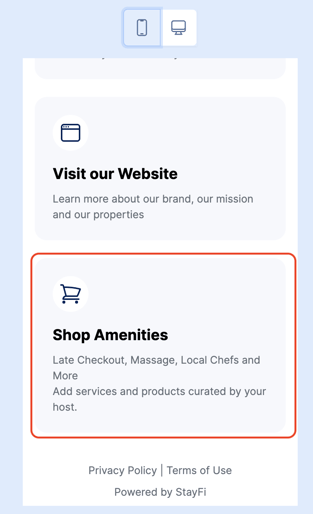
- To see how your guests will view your stores, click on the 👁️🗨️ icon in the Preview column and look for the "Shop Amenities" tile. Click on to be taken to that property's store.
Set up your HostCo account
Set up your HostCo account to manage your stores, add your own inventory, enable or disable default products, add administrators and approvers to your account, and set up payouts.
To set up your HostCo account, look an email you will have received from their support team:
Email subject: Welcome to the team! Now what?
Email sender: [TheHost] support@thehost.co <support@thehost.co>
Follow the instructions on the email to set up your account.
Once you’ve activated your account, log-in to the Host Co and edit your stores. Make sure each store is matched to the amenities and products you’d like to offer at that property, and add anything you’d like to offer.
Once you’ve completed editing your stores, on top of them being automatically shared in your StayFi homepages, we recommend adding your unique store links to your automated messaging, and including specific names of popular products you’re offering at each location.
We recommend sharing your store link at booking, two weeks before check-in and at check-in. To access The Host Co’s messaging templates, click the “Share Store” button in your Host Co store.

Questions? For detailed instruction on how to manage your account and stores, join a live demo of The Host Co to help get you set up.
Get in touch with The HostCo
If you have specific questions about The HostCo, want to learn more about their product or need assistance with your stores, get in touch with their team through the following channels:
- For assisted sign-ups and learning how to maximize your sales: book a demo.
- For general questions and help, email support@thehost.co
- For immediate help, use the chatbot on their website (M-F 9-5PST)